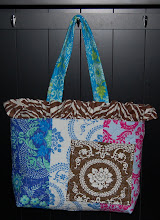
CoCoJ Designs “Anna’s” Diaper Bag
Why did I come up with this bag? 3 reasons: 1-Because I have never used a stabilizer and don't really want to? 2-I wanted to use fabric I like, not pre-quilted fabric and I wanted the quilted look and feel and stability. 3-I wanted lots of big pockets for diapers/wipes, sippy cups, snacks, crayons/toys, my wallet/keys/cell phone, etc. All things need their place and should be easy to grab. So here we go… And please read through the entire tutorial before you start…looking ahead at the pictures helps you see what my words did not explain very well...and click on all pictures for more detail. Good Luck!
1-Free motion 1 yard of fabric onto a piece of pre-quilted material (Here is a tutorial on free motioning if you need to start there
Crazy Mom Quilts Free Motion Tutorial
2-Cut 19 x 28 inch piece leaving the 28 side open to cut the long straps from

3-Cut outside 8 x 9 inch pocket
.JPG)
4-Fold top of pocket down twice and sew it to hide the raw edge
.JPG)
.JPG)
5- On pocket fold and pin under other 3 raw edges
.JPG)
6-Pick a spot (I like to match the pattern up), pin in place and sew 3 sides onto the outside of the bag (leaving the top of the pocket open…I’m just reminding you not sew your pocket closed!)
.JPG)
7-The body: fold in half right sides together, pin and sew 2 side edges closed (leaving the top of the bag open)
.JPG)
8-Make triangles 4 inches and pin, then sew…now the outside body is finished! (this forms the rectangle in the bottom of your bag and gives it body, do not cut these off) Then turn this outer body right side out.
.JPG)
.JPG)
.JPG)
You should be here…Yeah! ! !
.JPG)
9-Now cut liner 20 x 28 inches from a pre-quilted material
.JPG)
10- Cut 2 pieces of pre-quilted material 13 x 20 inches to make the inside pockets with
.JPG)
11-Fold down 20 inch side of inside pocket fabric twice and sew to hide the raw edge (Yes I am still in my robe and I have hairy arms, moving along now…)
.JPG)
12-Pin wrong side on the right of liner turning the bottoms of each pocket piece under and iron. Leave 3 ½ inches open between the pockets
.JPG)
13-Sew the bottom of the pockets straight across onto the liner
14-Sew 2 pocket slits 6 inches from each side (or as many you like…one for diapers, one for sippy cup, one for snacks, etc)
.JPG)
.JPG)
.JPG)
15- Fold liner in half right sides together and sew the 2 sides closed (like Step 7)
16-Make triangles 4 inches, pin and sew (like step 8) Do cut the triangles off on the liner. Ta-Da your liner!
.JPG)
17-Lets make straps. Cut 2 pieces of self quilted material 33 x 5 inches
.JPG)
18-Fold the short side in half to 2.5 inches right sides together and sew 33 inch side…same for both straps
19-Turn straps right side out. Iron flat. Sew a seam or two to give the strap some body (I free motion these to match, I hope you can see this in the 2nd picture)
.JPG)
.JPG)
20-Let’s make the ruffles. Cut 2 pieces 6 x 44 inches (or the width of your material, this leaves finished edges) not quilted material. Fold in half to 3 inches with wrong sides together and sew 2 rows of basting stitches (long stitches) along the 44 inch side.
.JPG)
21- Scrunch ruffles until each are 20 inches long and tie off ends with the thread (if you do not know how to do a basting stitch…go here and learn really quickly…
Gathering Fabric into Ruffles22- Putting it all together. Iron and pin down edge of the OUTER BODY to hide the raw edge about ½ inch. Then Pin the ruffle to it and sew ruffle in place (I use the inside of my presser foot as my guide) Sorry for switching bags on you…I didn’t photo this well when I made the red bag)
.JPG)

23-Iron and pin down the liner to hide the raw edge. See pictures above.
24 -Slip the liner into the shell (already did this in picture sorry)
25-Place straps between the liner and shell with pins (I usually put them in about 1 inch) but place with the straps to your comfort level before sewing them in.
26- Pin liner and outer body together and stitch in the ditch of the shell. Ta Da! Finito! Good Job! If it is not that cute, try again…now you know what you are doing. Finished size about 18" wide, 12.5" high with ruffle and 3" deep.
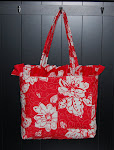
Red Floral Diaper Bag

Jennifer Paganelli's Sis Boom Patchwork Fabric Quilted Diaper Bag

I will work on posting a printable version...Please comment or email me with questions or problems...and I'll try to address them. Thank you...and Enjoy my 1st tutorial!
Ps. You should have enough material left over to make a matching wallet...so scoot over to That Darn Kat and she'll teach you how.
That Darn Kat Quilted Wallet TutorialPss. Printable tutorial is now ready...see side bar for link.
CLICK HERE TO JUMP TO MY HOME PAGE


 Ok...it is pinned and ready for a final stitch around...this will sew the liner to the bag and attach the handles in one big circular motion. Who is this for? Oh yeah...I still am not sure...oh well time to go see Santa at the crazy Mall....Say Cheese.
 Back in the saddle again...finally...working on a Jennifer Paganelli bag...sewing machine feels like it needs oil? It is just not running very smooth? Rented a free Redbox movie for C so I could sew...and I got what I paid for a movie that skips so bad I have no idea what it is about...Hotel for Dogs. Oh well no money lost.
 BACKs.....the new bag has two outside pockets...one on each side...(they blend in-can you spot them?)
 .JPG) Inside...I made a little tie together...(the inside has 6 pockets)...
Inside...I made a little tie together...(the inside has 6 pockets)....JPG) Sis Boom yummy bags.
Sis Boom yummy bags.

.JPG)
.JPG)
.JPG)


.JPG)
.JPG)
.JPG)
.JPG)
.JPG)
.JPG)

.JPG)


.JPG)
.JPG)
.JPG)
.JPG)
.JPG)
.JPG)
.JPG)
.JPG)
.JPG)
.JPG)
.JPG)
.JPG)
.JPG)
.JPG)
.JPG)
.JPG)
.JPG)
.JPG)
.JPG)
.JPG)
.JPG)
.JPG)
.JPG)