Wednesday, June 10, 2009

Looking for one of these?


I am. I tried to sew a few stitches after messing with the tension...it won't sew a toot.

Tuesday, June 9, 2009

Hi

Hi...I'm sick with a Sinus cold, had my left wrist cyst drained yesterday...And oh yeah I broke my sewing machine...Friday using the elastic thread. I'll be back in action...at a later date. Time to go feed baby boy some "Tiger cereal"

Friday, June 5, 2009

Shirred Something?


So I got my new elastic thread out this a.m. and tried to make myself a red floral shirred dress. After 8 rows of problems...I decided to call the doctor and schedule myself an appointment to have my wrist cyst drained (gross...sorry). It has been killing me lately...thus I have not wanted to read...Eclipse...stinking hardback is just that much more painful to hold...or sew...and anyway the lady said can you be here in 1 hour and 20 minutes. I said sure....scramble to get ready and off we go to get a referral.

So we got back home...I decided to get my sewing machine book out and read about tension. Wow...this made a huge difference. Another problem thus far...well using your bust size to cut the material...is NOT right...who told me that and why did I not see that info was WRONG!!!? So I can shirr another piece and sew them down the sides? Or make this into a dress for a little girl...that the stitching is not so pretty on? I guess I will shirr another piece and sew on the sides...at least I can salvage it as a pool cover up?

Ps. Perrywinkle's called to say my purse was in so I picked it up (my Mother's Day purse)...is it totally wrong that I bought Vera and didn't make one like it myself? Oh well. I love you Cupcake Green Morgan. Thanks C.J. I love being your mommy.

New Birks


Finally decided. I really wanted the Zebra Luca Betulas...on Ebay...they are now at $118.00 and well I really wanted those and a brown pair...so after a week of searching online I went with Macy's and got 2 pair with free shipping for less than that...Black Patent and Golden Brown. Decisions...flat or shiny...dressy seems to be the way...I just had to think what would I wear with my Georgia Tech shirts in the fall to the games. I am excited. Don't make fun of my Birk's or you'll have to massage my aching back the reason I am going with these shoes to begin with. Happy Friday. I do hope to sew today...with elastic thread...and make a shirt or two. So check back later Aunt Delona ;)

Tuesday, June 2, 2009

Brainy Baby DVD Free!


Hi...My mother-in-law works for Brainy Baby...It is their Birthday...and they are giving away DVDs!!! My son has them all of course...and loves them. He will be 2 1/2 this week...he knows his colors, shapes, some letters and numbers...and yeah it might be because he's watched these dvds a few hundred times. So check them out. You do pay shipping...$6.95.

The link is Free Brainy Baby DVD

Birkenstocks, Birki's, Papillios

I am still on a bit of a shoe hunt. Looking for the best shoe...comfort and cute...as cute as these can be...and they are HARD TO FIND.

I can only find the zebra with rhinestone buckle on Ebay...so I'm bidding...

If I don't win the Zebra ones and if I can't find someone to order them for me...I might get these...I love polka dots!

I like these...cause you need some to match brown...

I like these but they are too University of Georgia ish...

If I had a little girl I hope she'd want these fruity ones...

Friday, May 29, 2009

More Upcycled & Granola

I have upcycled a few more shirts...we went to the GT bookstore Memorial day...they had tons of ladies shirts for $5.00 because they are sized too small...so I bought a few with plans as such. Worked well...


Reconstructed a I heart New York shirt...is it about time to go back up there?

And no I DO NOT like granola...well Quaker smore granola bars yes...and no I DO NOT hug trees...but I have lots of planted things growing tomatoes, cucumbers, zucchini, fuchsia, wildflowers, watermelon, and YES I do shave my arm pits. So why all this hippy talk? I got something from the UPS man today...Birkenstocks. I bought them off EBAY. I had some back in middle/high school...and well I'm not sure if it happens to everybody when you turn 30 but...my back hurts...and I thought these would give me some support as apposed to my millions of pairs of super cute Yellow Box Flip Flops and well New Balance are too hot to wear to the ball field. Perhaps my back hurts because I stand up and sew at the kitchen cabinet so ba-boo can run laps around me rather than sewing at my table in my sewing closet. Anyway we'll see how this goes. Hubbie is going to say they are so ugly. They are the "Zara" Betulas.

Oh...I didn't see these...RHINESTONES and ZEBRA PRINT!!! Maybe they would have been a better choice...or maybe I'll get them if they help.

Ruffle Shirt Tutorial


Found another tutorial that I want to try...both are cute short UTube Videos. She doesn't have a picture...so I found one that is similar...sorry.

Make the pattern...
Ruffle Shirt Pattern


Then make the shirt...
Ruffle Shirt Tutorial

Thursday, May 28, 2009

Upcycling T-Shirts


Ok...I found a FAN-tastic sight this morning...I was looking for ways to Upcycle T-shirts...Jackpot! Craftstylish is the name.

I started with one of hubbie's old white XL t-shirts...read the Yoke Neck tutorial...and just stopped after tying off the basting stitches. I also cut the sleeve hems and bottom hem off...so all edges are raw. And no I won't wear this shirt in public...it is just my tester shirt. I do like the fit...and will be great when I am preg again...so easy maternity shirts...this took minutes.

Yoke Neck Yoke Neck Tutorial

Then I tried it on one of my size medium shirts...and used the seem ripper to take the hem out...(I'm tall I always want more length.) Nice.

Others I am going to try. We have millions of t-shirts...and they are always giving them away at Georgia Tech games...now I can girly them up a bit.

Cardigan will be super cute with a little tank underneath!
Cardigan Tutorial

Pin Tucks Pin Tuck Tutorial

Ok so the next time you are at a concert and they run out of your size buy a size or two or three larger and make it your own!

oops...I forgot to show the cowl also...
Cowl Tutorial

Wednesday, May 27, 2009

Quilts


Last night I laid out some Snippets by American Jane, Moda Turnovers...into a pinwheel quilt. This is my first turnover packet...and first pinwheel quilt...it is going to be a baby quilt. Each of the 9 color palettes on this quilt are not in place yet...I was just trying some things out.

And today I am working on my Dad's quilt.

Friday, May 22, 2009

"Anna's" Diaper Bag Tutorial

CoCoJ Designs “Anna’s” Diaper Bag

Why did I come up with this bag? 3 reasons: 1-Because I have never used a stabilizer and don't really want to? 2-I wanted to use fabric I like, not pre-quilted fabric and I wanted the quilted look and feel and stability. 3-I wanted lots of big pockets for diapers/wipes, sippy cups, snacks, crayons/toys, my wallet/keys/cell phone, etc. All things need their place and should be easy to grab. So here we go… And please read through the entire tutorial before you start…looking ahead at the pictures helps you see what my words did not explain very well...and click on all pictures for more detail. Good Luck!

1-Free motion 1 yard of fabric onto a piece of pre-quilted material (Here is a tutorial on free motioning if you need to start there
Crazy Mom Quilts Free Motion Tutorial

2-Cut 19 x 28 inch piece leaving the 28 side open to cut the long straps from

3-Cut outside 8 x 9 inch pocket

4-Fold top of pocket down twice and sew it to hide the raw edge


5- On pocket fold and pin under other 3 raw edges

6-Pick a spot (I like to match the pattern up), pin in place and sew 3 sides onto the outside of the bag (leaving the top of the pocket open…I’m just reminding you not sew your pocket closed!)

7-The body: fold in half right sides together, pin and sew 2 side edges closed (leaving the top of the bag open)

8-Make triangles 4 inches and pin, then sew…now the outside body is finished! (this forms the rectangle in the bottom of your bag and gives it body, do not cut these off) Then turn this outer body right side out.


You should be here…Yeah! ! !

9-Now cut liner 20 x 28 inches from a pre-quilted material

10- Cut 2 pieces of pre-quilted material 13 x 20 inches to make the inside pockets with

11-Fold down 20 inch side of inside pocket fabric twice and sew to hide the raw edge (Yes I am still in my robe and I have hairy arms, moving along now…)

12-Pin wrong side on the right of liner turning the bottoms of each pocket piece under and iron. Leave 3 ½ inches open between the pockets

13-Sew the bottom of the pockets straight across onto the liner
14-Sew 2 pocket slits 6 inches from each side (or as many you like…one for diapers, one for sippy cup, one for snacks, etc)


15- Fold liner in half right sides together and sew the 2 sides closed (like Step 7)
16-Make triangles 4 inches, pin and sew (like step 8) Do cut the triangles off on the liner. Ta-Da your liner!

17-Lets make straps. Cut 2 pieces of self quilted material 33 x 5 inches

18-Fold the short side in half to 2.5 inches right sides together and sew 33 inch side…same for both straps
19-Turn straps right side out. Iron flat. Sew a seam or two to give the strap some body (I free motion these to match, I hope you can see this in the 2nd picture)


20-Let’s make the ruffles. Cut 2 pieces 6 x 44 inches (or the width of your material, this leaves finished edges) not quilted material. Fold in half to 3 inches with wrong sides together and sew 2 rows of basting stitches (long stitches) along the 44 inch side.

21- Scrunch ruffles until each are 20 inches long and tie off ends with the thread (if you do not know how to do a basting stitch…go here and learn really quickly…
Gathering Fabric into Ruffles
22- Putting it all together. Iron and pin down edge of the OUTER BODY to hide the raw edge about ½ inch. Then Pin the ruffle to it and sew ruffle in place (I use the inside of my presser foot as my guide) Sorry for switching bags on you…I didn’t photo this well when I made the red bag)


23-Iron and pin down the liner to hide the raw edge. See pictures above.
24 -Slip the liner into the shell (already did this in picture sorry)
25-Place straps between the liner and shell with pins (I usually put them in about 1 inch) but place with the straps to your comfort level before sewing them in.
26- Pin liner and outer body together and stitch in the ditch of the shell. Ta Da! Finito! Good Job! If it is not that cute, try again…now you know what you are doing. Finished size about 18" wide, 12.5" high with ruffle and 3" deep.

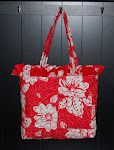
Red Floral Diaper Bag

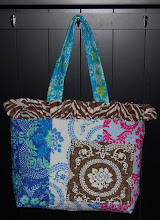
Jennifer Paganelli's Sis Boom Patchwork Fabric Quilted Diaper Bag

I will work on posting a printable version...Please comment or email me with questions or problems...and I'll try to address them. Thank you...and Enjoy my 1st tutorial!

Ps. You should have enough material left over to make a matching wallet...so scoot over to That Darn Kat and she'll teach you how.
That Darn Kat Quilted Wallet Tutorial

Pss. Printable tutorial is now ready...see side bar for link.

CLICK HERE TO JUMP TO MY HOME PAGE